Plastering and Finishing Tools: Trowels, Floats and Straightedges
The first test of any plastered wall is not touch but sight: put a light source at an acute angle to the surface and look along it. Raking light shows every wave, every trowel line and every hollow without mercy. What surprises people is that most of the defects it reveals are not caused by the mortar, but by the wrong tool or the wrong timing on the surface.
The tool set and what each does
Every plastering tool has a specific job no other tool does, and trying to do everything with one tool is the leading cause of a poor surface.
| Tool | Function |
|---|---|
| Hawk | Square board with an underslung handle, holding mortar near the work and feeding the trowel |
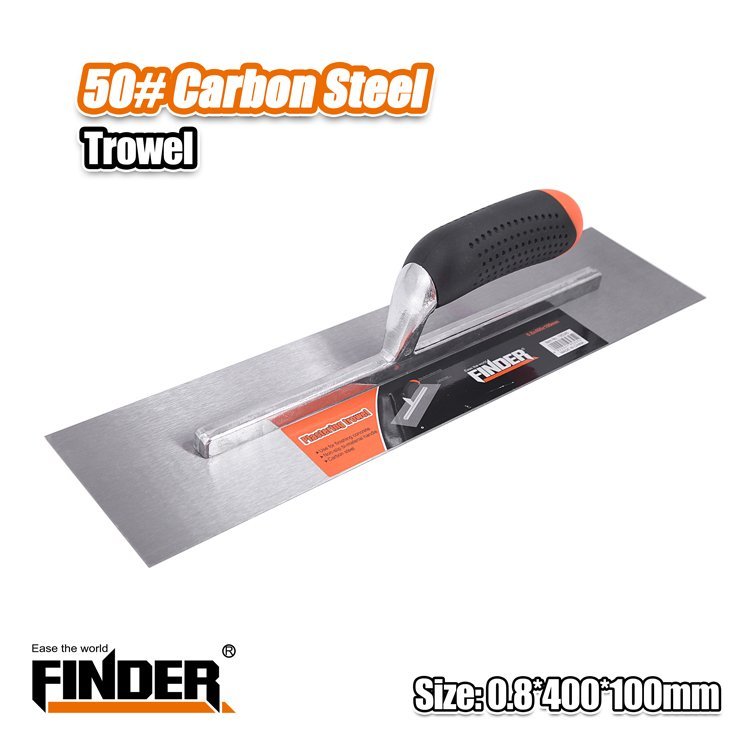
| Steel trowel | Applying, spreading and compressing mortar; producing the final smooth finish |
| Float | Levelling, opening the surface pores and revealing hollows; leaves an even textured surface |
| Darby / straightedge | Cutting off surplus and ruling the surface flat between corners and screeds |
| Corner trowel | Forming internal and external corners to a sharp straight line |
| Sponge float | Final finishing of the top coat for an even texture and open surface |
| Brush | Wetting the surface to control suction and assist finishing |
| Level and line | Setting plumb and straightness before and during work |
A float is not a small trowel
The difference is fundamental. A steel trowel has a hard smooth face: it compresses the mortar, closes the surface and leaves it smooth and burnished. A float has a wooden, plastic or sponge face: it does not close the surface but opens it, leaving an even textured finish.
So using a steel trowel to finish a cementitious coat closes the surface completely, trapping moisture, reducing the bond of any subsequent coat, and risking surface crazing. The reverse is also true: floating where a fully smooth surface is required leaves a texture unsuitable for direct decoration. Choose by the surface required and the next coat.
Stainless versus carbon steel
A carbon steel trowel is stiffer and relatively less flexible, giving direct feel of the surface, and is traditionally preferred in cementitious work. But it rusts, must be cleaned and dried after every use, and any rust transfers staining to a white or pale surface.
Stainless does not rust and is the safe choice with gypsum materials, pale mortars and surfaces that tolerate no staining. It is also easier to maintain and keeps its smooth face longer.
Practically: stainless is the sound default for most work, especially gypsum and pale finishes; carbon steel remains many plasterers' preference in cement work for the stiffness it gives, provided it is cleaned and dried.
Why a new trowel needs breaking in
A new trowel leaves the factory with sharp edges and sometimes unrounded corners. Those sharp edges cut and score fresh mortar, leaving clear lines that finishing cannot remove, and they tend to dig in rather than glide.
Breaking in means rounding the four blade edges and corners so they slide smoothly, which happens naturally with use and repeated cleaning. It can be accelerated with fine abrasive paper or a stone, with two cautions: do not touch the flat face in a way that spoils its flatness, and do not round the edges so far that the trowel can no longer cut mortar when needed.
With long use a very slight curvature develops in the blade, which many plasterers prefer because it helps leave a cleaner, line-free surface. That is why a tradesperson favours one particular trowel and does not give it up easily.
Tool care is not a luxury: set mortar on a trowel or float face creates a hard ridge that leaves a line on every pass. Wash tools immediately after each batch before the mortar dries, dry carbon steel, and occasionally check the trowel face against a known straight surface.
The coat sequence and why each coat exists
Scratch / preparatory coat. A thin coat applied to the background for two purposes: equalising suction and improving adhesion. Block and brick absorb water unevenly, and the mortar joints absorb at a different rate from the units — a difference alone sufficient to produce variation in set and final texture. On smooth, low-suction concrete, this coat or a bonding agent becomes essential, because smooth concrete gives the plaster nothing to key into.
Base coat. The load-bearing coat providing thickness, correcting deviation and building straightness and plumb. Flatness comes from here; a thin finish coat cannot rectify an out-of-flat wall. It is applied between screeds and ruled off to their level.
Finish coat. Very thin, for final texture and a surface ready for decoration. It has less strength and thickness, so it must be weaker than what is beneath it.
An unbreakable rule: each coat must be equal to or weaker than the coat beneath it, never stronger. A cement-rich finish over a weaker base shrinks harder and drags the weaker layer with it, producing cracking and detachment. Strength always decreases from inside outward.
Keying between coats
A second coat only bonds if it finds something to key into. A smooth closed surface offers no mechanical grip, so the coats separate later and a hollow area appears.
Keying is achieved by scratching with a comb or notched tool once the surface is firm enough to take it without tearing, by leaving the surface open and textured with a float rather than closing it with a steel trowel, or with a bonding agent on closed surfaces where necessary.
Timing is critical: scratching too early drags the mortar and spoils flatness; too late leaves no useful key. And if a coat has fully hardened and dried before the next is applied, the surface needs pre-wetting so it does not draw water from the new coat and deprive it of curing.
Timing is the real skill
If one thing separates an experienced plasterer from a beginner, it is reading the surface and judging the right moment for each operation. The same mix and the same tools give completely different results depending on when they are worked.
Working too early: the mortar is still plastic and moves, so finishing drags it and destroys the flatness achieved. Trowel pressure on a surface that has not begun to set drives water and fines to the surface, forming a water- and fines-rich surface layer — the main cause of surface crazing. And edges and corners collapse rather than holding.
Working too late: the surface has begun to set and no longer responds; pressure breaks down the structure forming and weakens it. Trowel lines and marks appear that cannot be removed, and filling hollows on a setting surface produces a patch that does not bond and shows as detachment or a colour difference.
Reading the moment: a surface ready for finishing has lost its excess wet sheen and resists finger pressure clearly while still taking a light mark. If a finger sinks easily it is too early; if it leaves no mark at all, too late. That window is not fixed — it shortens markedly in hot dry windy conditions, on high-suction backgrounds, and with cement-richer mixes. Divide the work into areas whose full cycle can be completed in the time available, not large areas whose edges dry before you reach them.
Achieving a flat wall with screeds and a straightedge
- Survey the wall and find the high point with a long level or taut lines. The proudest point sets the minimum thickness everywhere else.
- Set thickness dots of mortar at the corners, adjusted plumb and level to define the finished plane.
- Form screeds — vertical mortar bands between those dots, or fixed metal beads — spaced closer than the straightedge length so it bears on two at once.
- Fill between screeds with base coat, slightly proud.
- Rule off bearing on both screeds with an upward sawing motion, collecting the surplus. The sawing motion matters; a straight upward pull leaves waves.
- Fill hollows immediately and re-rule in the same session, not later — hollows show the moment the straightedge passes.
- Float the surface in circular motions to unify it and expose any remaining hollows.
- Finish at the right moment with a steel trowel for smooth, or a sponge float for an even texture.
- Corners last with a corner trowel and straightedge for a sharp line, checking external corners for plumb.
Note: the straightedge length sets the scale over which you are flat. A short one rides over long waves without revealing them. Use the longest practical length, and check the finished result with one longer than you worked with.
Common defects and their real causes
Cracking
- Cement-rich mix: more cement means more shrinkage, and restrained shrinkage cracks. A rich mix is not stronger in the end, just more crack-prone.
- Rapid drying: direct sun, dry wind and heat remove water before strength develops. Cure, wet and shade.
- Excessive thickness in one coat: more shrinkage and slumping under its own weight.
- Unwetted high-suction background drawing water out of the mortar.
- Cracks following a defined line — along the junction of two different materials or a buried conduit route — are not a plastering defect but background movement or material difference; reinforce the junction with mesh rather than adding mortar.
- Very lean mix: dusting and cracking from poor cohesion.
Hollowness and poor adhesion
Tapping lightly with a fingernail or piece of timber gives a dull sound over sound areas and a hollow drum-like sound over detached ones. Causes: a dusty, oily or mould-oil contaminated background; a smooth closed surface with no key and no bonding agent; omission of the preparatory coat on a low-suction background; applying over a fully dried coat that absorbs the new coat's water; a stronger coat over a weaker one pulling it off; and an over-saturated background with a water film preventing contact.
Surface crazing
A network of very fine shallow cracks. The root cause is a water- and fines-rich surface layer, produced by over-trowelling with the steel trowel, finishing before the surface has begun to set, or splashing water onto the surface during finishing to ease the trowel. It shows clearly after decoration and is hard to repair, so prevention is the only practical answer: do not finish early, do not wet the surface to ease the trowel, and do not over-trowel.
Other defects
- Trowel lines: a sharp tool edge, set mortar on the tool, or late finishing.
- Patchy colour variation: uneven background suction, inconsistent batches, or late patching.
- Out-of-straight corners: no screeds or beads, or plumb not checked.
- Waves visible under raking light: too short a straightedge, screeds spaced wider than it, or ruling with a pull instead of a sawing action.
Summary
Good plastering is a system of three things: correct, well-maintained tools; a coat sequence respecting decreasing strength from inside outward with proper keying between coats; and accurately read timing. A steel trowel closes the surface and a float opens it, so each has its place. A new trowel needs its edges broken in before it leaves a line-free surface. Flatness comes from screeds and a long straightedge worked with a sawing action, not hand skill alone. And most defects blamed on the mortar actually come from wrong timing, a stronger coat over a weaker one, or rapid drying left unaddressed.