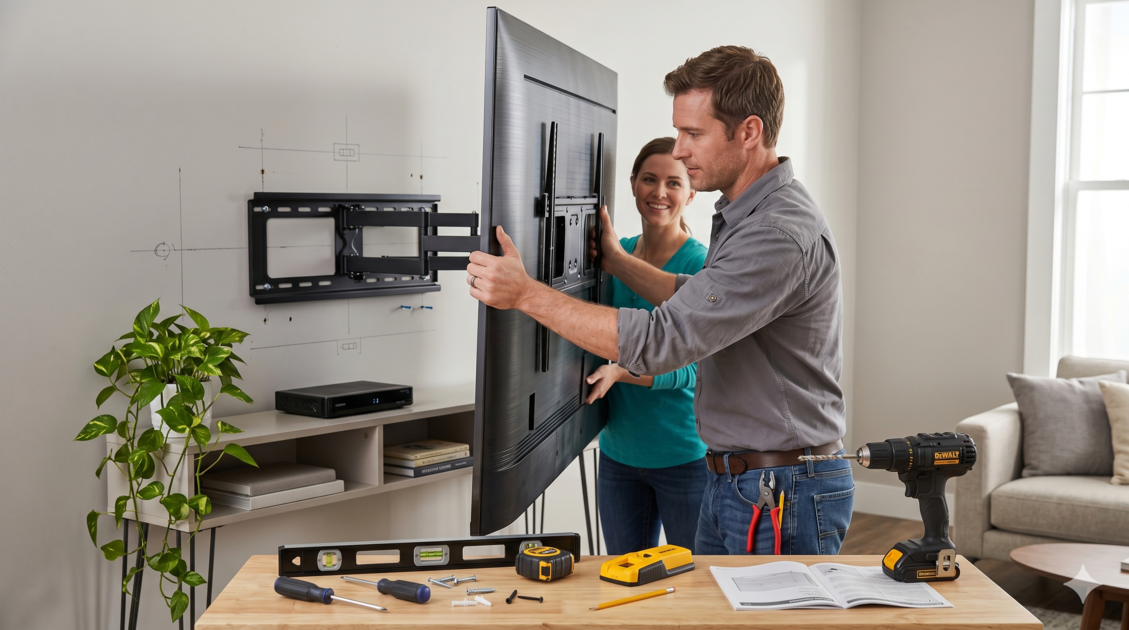
How to Mount a TV on the Wall: Tools and Step-by-Step Guide
Why Mount Your TV on the Wall?
Wall-mounting your television has become a popular choice in modern Jordanian homes for numerous practical and aesthetic reasons. Instead of placing the screen on a table or cabinet that takes up significant floor space, wall mounting gives you a sleek, modern look and frees up valuable floor space -- especially in the smaller apartments commonly found in Amman, Irbid, and Zarqa.
Beyond aesthetics, mounting the TV at the right height provides a better viewing angle and keeps the screen out of reach of small children, reducing the risk of it falling or getting damaged. Proper installation also helps organize and hide cables for a tidy appearance.
In this comprehensive guide, we will walk you through mounting your TV on the wall step by step, covering the required tools, available bracket types, and important safety tips to keep in mind.
Types of TV Brackets
Before starting the installation, it is important to choose the right bracket type for your needs. There are three main types of TV brackets available in the Jordanian market:
1. Fixed Mount
The simplest and least expensive type, a fixed mount secures the TV flat and directly against the wall with no ability to move or tilt it. This type is suitable for rooms where the seating is directly opposite the screen. Prices in Jordan range from 8 to 20 JOD depending on the supported screen size.
- Advantages: Low cost, easy installation, screen sits very close to the wall (only 2-3 cm)
- Disadvantages: No viewing angle adjustment, difficult access to rear cables after installation
2. Tilting Mount
This type allows tilting the screen up or down at an angle typically ranging from 5 to 15 degrees. It is an excellent choice when the TV is mounted above eye level, such as above a fireplace. Prices range from 15 to 35 JOD.
- Advantages: Reduces light reflections, suitable for high mounting positions
- Disadvantages: Does not swivel left or right
3. Full-Motion / Articulating Mount
The most flexible type, featuring an articulating arm that allows swiveling the screen left and right, tilting up and down, and even extending it away from the wall and back. Ideal for corners or open-plan rooms where you need to adjust the viewing angle from multiple seating positions. Prices range from 25 to 70 JOD.
- Advantages: Full flexibility in control, viewing from multiple angles
- Disadvantages: More expensive, requires more space behind the screen, slightly more complex installation
How to Choose the Right Bracket
When selecting a bracket, make sure to check:
- VESA Compatibility: VESA is the standard for the distance between the mounting holes on the back of the TV (e.g., VESA 200x200 or 400x400). Measure the distance between the four holes on the back of your screen and buy a bracket that supports the same specification.
- Maximum Weight: Ensure the bracket can support your TV's weight. Modern 55-inch TVs typically weigh between 15 to 20 kg.
- Screen Size Range: Most brackets support a range of sizes (e.g., 32-70 inches).
Required Tools and Materials
For a professional and safe TV wall installation, you will need the following tools and materials:
Essential Tools
- Electric Drill: This is the most important tool in the installation process. You need a drill powerful enough to bore through the wall. For the concrete and stone walls common in Jordanian buildings, you need a hammer drill with at least 600 watts of power. Excellent options available at ESCO include: Bosch GSB 13 RE at 600W, Makita HP1630 at 710W, or the INGCO ID8508 at 850W as an excellent budget option. For higher-performance options, the DeWalt DWD024 or the cordless Milwaukee M18 are available for professionals.
- Masonry Drill Bit: In 8mm or 10mm size depending on the wall plug used. Make sure to choose a bit designed for masonry with a tungsten carbide tip. ESCO offers high-quality drill bit sets from Bosch and TOTAL at reasonable prices.
- Screwdriver or Socket Wrench: For tightening bolts on the bracket. You will typically need a 10mm or 13mm socket wrench. Stanley or FINDER wrench sets available at ESCO provide all the sizes you might need.
- Spirit Level: Essential for ensuring the bracket is perfectly level. Nothing looks worse than a tilted TV screen! A 60cm spirit level is sufficient for this purpose. INGCO and Stanley levels are available at ESCO starting from 3 JOD.
- Pencil and Tape Measure: For precisely marking hole positions. A 5-meter tape measure from Stanley or FINDER will do the job.
Required Materials
- TV Bracket: According to your chosen type
- Wall Plugs (Anchors): In the appropriate size for your wall type. For concrete walls, use heavy-duty plugs in 8mm or 10mm
- Mounting Screws: Usually included with the bracket, but ensure their length is appropriate for your wall thickness (typically 50-70mm for concrete walls)
- Cable Cover Channels: Optional but gives a clean, tidy appearance
Additional Helpful Tools
- Stud/Wire Finder: Very important for avoiding water pipes or electrical wires inside the wall. The Bosch GMS 120 detects wires, metals, and plastic pipes
- Safety Glasses and Dust Mask: For protection against concrete dust while drilling
- Small Vacuum Cleaner: For cleaning up dust after drilling
Knowing Your Wall Type: A Critical Step
Before you start drilling, you must identify the type of wall you will be mounting the TV on, as this affects the type of plugs, screws, and even the feasibility of mounting:
Reinforced Concrete Walls
The most common type in Jordanian buildings, especially in residential apartments. This type is very strong and can easily support the weight of large screens. You need a hammer drill and a masonry bit. Use heavy-duty plastic plugs in 10mm with 60-70mm screws.
Brick Walls
Also common in Jordan. Strong but easier to drill through than concrete. Use the same concrete tools while being careful not to drill into mortar lines (the joints between bricks).
Drywall / Gypsum Board
Common in modern interior designs and offices. Important warning: Drywall alone cannot support the weight of large TVs! If your wall is drywall, you must:
- Secure the bracket into the metal or wooden studs behind the drywall, or
- Use special drywall anchors such as toggle bolts for lighter screens (under 15 kg)
- For heavy screens on drywall, it is recommended to install a thick wooden board (at least 18mm) secured to the studs, then mount the bracket onto it
Step-by-Step TV Wall Mounting Guide
After preparing all your tools and choosing the right bracket, follow these steps in order:
Step 1: Determine the Right Height
The general rule is that the center of the screen should be at eye level when seated. In most cases, this means placing the center of the screen at 110 to 130 cm from the floor. If the screen is in a bedroom and will be viewed while lying down, raise it slightly. Use the tape measure and pencil to mark the desired center on the wall.
Practical tip: Before drilling, tape a piece of paper the size of your TV on the wall and sit in your usual spot to confirm the height and position are suitable.
Step 2: Inspect the Wall
This is a safety step you should never skip. Use a wire finder to scan the area where you will be drilling. Move the device slowly across the entire area and around it. If you do not have a wire finder, avoid drilling directly above, below, or beside electrical switches and outlets (sockets), as electrical wires typically run vertically or horizontally from these points.
Step 3: Mark the Hole Positions
- Hold the wall plate of the bracket against the wall in the desired position
- Place the spirit level on top and adjust until it is perfectly level
- Use a pencil to mark the hole positions through the mounting holes in the plate
- Double-check the distances and level before proceeding to drill
Tip: It is best to have someone help you hold the plate while marking to ensure accuracy.
Step 4: Drill the Holes
Now we reach the step that many people fear, but it is easier than you might think:
- Put on safety glasses and a dust mask
- Insert the appropriate masonry bit into the drill (same size as the wall plugs)
- Activate the hammer mode on the drill
- Place the bit tip on the mark and press straight and steady
- Start at a slow speed and gradually increase
- Drill to a depth about 5-10mm deeper than the length of the wall plug
- Repeat the process for all holes (usually 4 holes)
Warning: Do not apply excessive pressure on the drill. Let the tool do its work. Excessive pressure can break the bit or damage the wall. If you encounter severe resistance (possibly a rebar), stop and move the hole a few centimeters.
Step 5: Install the Wall Plugs and Screws
- Clean the holes of dust by blowing or using a small vacuum
- Insert the plastic wall plugs into each hole. They should go in with light finger pressure or gentle taps with a hammer. If they go in too easily, the hole is too large and you need a bigger plug size
- Secure the bracket's wall plate to the wall using the included screws
- Tighten the screws firmly using a socket wrench, but do not over-tighten to avoid damaging the plugs
- Verify that the plate is firmly secured and does not move when pulled or pushed
Step 6: Attach the Bracket Arms to the TV
- Place the TV face-down on a soft surface (blanket or mattress)
- Attach the hanging arms or back plate to the rear of the TV using the screws provided with the bracket
- Ensure the screws fit the VESA holes on your TV. Sometimes you may need spacers if the back of the TV is not flat
Step 7: Hang the TV
This step definitely requires two people:
- Connect all cables (HDMI, power, internet) before hanging, as access will be more difficult after installation
- Carefully lift the TV with your helper and hang it on the wall-mounted plate
- Make sure the hanging arms have properly seated into the plate
- If the bracket includes safety screws, secure them immediately
- Test the screen's stability by gently pressing on it from the top and bottom
Step 8: Final Adjustment and Organization
- Adjust the screen tilt and angle as needed (if the bracket supports it)
- Organize the cables using cable cover channels or mounting clips
- Turn on the TV and make sure everything is working properly
- Clean the area of drilling dust
Important Safety Tips
Safety always comes first. Follow these important guidelines:
- Never mount a TV on unsupported drywall: The TV could fall and shatter, potentially injuring someone, especially children
- Ensure there are no electrical wires or water pipes: Drilling into a water pipe can cause catastrophic leaking, and hitting an electrical wire can cause a dangerous electric shock
- Do not work alone: TVs sized 55 inches and above are heavy and bulky, requiring at least two people to safely lift and hang
- Disconnect power to the area: If you are unsure about electrical wire paths, turn off the circuit breaker for that area
- Use high-quality tools: Cheap bits can break inside the wall, and a weak drill can overheat and malfunction. Invest in reliable tools from well-known brands
- Verify the wall can support the weight: Especially if it is a thin partition wall rather than a structural wall
Common Mistakes to Avoid
From experience, these are the most common mistakes beginners make when wall-mounting a TV:
- Not using a spirit level: Relying on the naked eye often results in a tilted screen. Even a slight tilt will be noticeable and will bother you daily
- Choosing the wrong height: Mounting the screen too high is the most common mistake. Your neck will ache from looking up for extended periods. The rule: center of the screen at eye level
- Using small wall plugs: A 6mm plug may not be sufficient for a heavy TV. Use 8mm or 10mm plugs with appropriate screws
- Not connecting cables before hanging: Especially with fixed mounts, accessing the rear ports becomes very difficult after installation
- Drilling without checking the wall first: You might hit a water pipe or electrical wire. Always use a wire finder or at least check the location of nearby outlets and switches
- Over-tightening screws: Excessive force can destroy the wall plug and weaken the mounting. Tighten until you feel good resistance, then stop
Hiding Cables: Achieving a Clean Look
After hanging the TV, the problem of dangling cables can ruin the appearance. Here are several ways to hide them:
- Plastic cable cover channels: These are plastic conduits that stick or mount to the wall, with cables running inside them. Available in different colors (white, gray) to match your wall color. Available at ESCO starting from 2 JOD per meter
- In-wall cable concealment: The best aesthetic solution but requires more work. You can cut a channel in the wall from behind the screen to the power outlet, then cover it with filler and paint
- Cable mounting clips: A simple and quick solution for organizing cables along the wall
When to Call a Professional
Although wall-mounting a TV is a viable DIY project, there are cases where it is better to hire a professional:
- If the wall is drywall and needs reinforcement
- If you want to hide cables inside the wall and need to run a new electrical outlet
- If the screen is very large (75 inches or more) and heavy
- If you are unsure about the wall type or electrical wire paths
- If you do not have the necessary tools and do not wish to purchase them
The cost of having a technician install a TV in Jordan typically ranges from 15 to 30 JOD depending on screen size and wall type.
ESCO Recommendations for the Best Installation Tools
To ensure a professional and safe installation, ESCO offers a curated selection of trusted tools:
Drills
- For regular home use: INGCO ID6808 at 680W - an excellent budget option starting at around 18 JOD
- For medium use: Bosch GSB 13 RE at 600W - one of the most popular and reliable drills, priced at around 35-40 JOD
- For professional use: Makita HP1630 at 710W or DeWalt DWD024 at 701W - high performance and exceptional durability
- For cordless use: Milwaukee M18 or Makita DHP453 - freedom of movement without cords, ideal when working far from power outlets
Hand Tool Sets
If you are starting to build your home tool collection, buying a complete set is more cost-effective than purchasing each tool separately. ESCO offers sets from Stanley, TOTAL, and FINDER that include socket wrenches, screwdrivers, tape measures, spirit levels, and more, with prices starting from 20 JOD for a basic set.
Mounting Supplies
Do not forget that ESCO also provides wall plugs in all sizes, various screws, cable cover channels, and organizing clips -- everything you need to complete the project in the best possible way. Visit your nearest branch or browse the website to see the full range of available products.
Conclusion
Wall-mounting your TV is an enjoyable and practical project that you can do yourself if you have the right tools and follow the correct steps. The key is good planning before you start: choose the right bracket, identify your wall type, prepare your tools, and follow safety guidelines. The result will be a securely mounted screen that gives your room a modern, elegant look.
To purchase all the tools and supplies you need for TV installation, visit your nearest ESCO branch in Jordan or shop online at esco.jo and get competitive prices with warranties on all products.